Sunday, 16 May 2010

New Stuff!

So i've not blogged in two weeks I think, been really busy in uni recently working full bore trying to get these characters out for the final show. I really want to be able to show something that i'm proud of or it'll be a nightmare. So over these last two or three weeks I've been working on my second character and he's almost finished :) Sadly I didn't manage to finish him this week but i'm giving myself one more day to finish it and that's it. Then I have two weeks for my final character, really tough but I think I can do it (there'll just be a lot of late nights in the studio).

Without further ado here's my last two weeks in pictures.
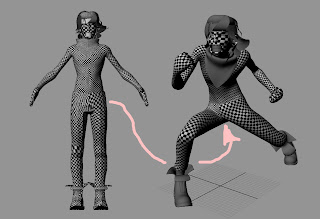

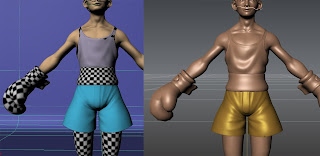
So I left off last time I believe when I had just finished modeling. Don't think I'd started UVs just yet. Anyway, here's my guy after I'd finished UVs. I must admit that I was quite messy with this project as I wasn't really sure of my workflow. I initially modeled him then got to posing without doing the UVs. You can see the posed model on the right and the T-pose model on the left. I posed him using a super crude rig that took a few minutes to make (and really I should've put more time into is as it threw up a few problems later on that could've probably been fixed earlier with more preparation.)

So. I had the posed model and the original model, but then I was like 'crap, how do I uv a model in such an extreme pose? That'll be tricky' so Andy suggested using blendshapes, which turned out to be a damn good idea. So I started UVing the t-pose model (and by the way I usually UV one side and then mirror it, saves a lot of time. Half way through I thought i'd ruined everything by mirroring it as I thought the blendshapes wouldn't work... but they did, miraculously.) and finished it up and that was all grand.

Above you can see both of my models. I found that when I originally applied the blendshape, where there was a lot of distortion in the mesh due to the poor weighting, the UVs went a little dodgy. So I went back into the UV editor and using the posed model I tweaked the UVs for better distribution. That's what the arrow in the pic is trying to show. The trousers on the t-pose model look dodgy, but when in it's action pose it's decent. So that was that.


I made this picture to take a look at the pose, which i'm actually pretty happy with. It's quite faithful to the scribbles I did and I think it looks fairly dynamic which is good.
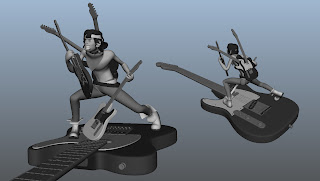

Here's the basemesh smoothed, looking pretty horrible, but what i'm trying to show is the guitar (would you have noticed? :P) I modeled the guitar using some reference and then duplicated it a million times for a laugh. I like the idea of having a guitar stand though, I might actually use that in the final. Happy accident!
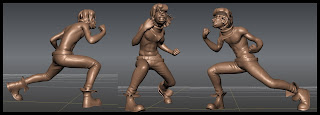

And here's where i'm at now! Almost finished mudboxing the guy :D all but the hair really, and i'm quite happy with what i've gotten. This probably doesn't show it off to it's fullest but hopefully my final reel will do that! I've enjoyed this stage a surprising amount. It's a good laugh using mudbox when it's going right for you. I had some trouble with the hair as originally it was a load of separate objects which I had to laboriously combine together, but now that's done and an hour or two and it should be complete :D can't wait to get him textured and finalised. Georg is gonna help me with the renders and hopefully he'll be beautiful!

So that's what i've got as far as 'real' work goes, but here're the little buggers that i'm blaming for me not hitting my target of completing that guy on friday. Friday was also the deadline for business cards and postcards, and being a perfectionist I buggered around with these for hours. Luckily they look good in the end and it's important to make a first impression, or so they say, so it's not all bad. Here are some .PNGs of my cards. I'm reeeeeeeallllyyyyyy hoping that they come out this colour, as some weird stuff has been happening with previewing the files that I made. In photoshop the TIFs (which are the files I sent off to be printed.) look great, just like these. If I save out .JPGs from the TIFs, they look dark and inferior. If I PREVIEW the TIFs in windows media preview they look like the crappy JPGs but in photoshop they look fine?! Arg. Hope for the best, assume the worst. Here they are anyway.
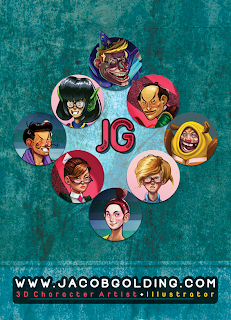

Snazzy yeah? I'm in the process of creating my website (which is much more complicated than I thought, but is being paid for by my brilliant cousin as a graduation present :D) and i'll probably go now right away and transfer some of these graphics :) Seeya in a week or two.

Monday, 3 May 2010

For Steve

Modeling for Andy Fossey's 'Corked' short film. (Turnarounds provided by Andy.)


Compilation of characters and a few finished concept paintings from my final major project


Sketches from the same project


3D iteration of one of the above characters (Work in progress)


Turntables of the pirate characters along with a video I put together as a pitch for the other project can be found on my Vimeo Account here.

Thanks for looking!

Postings

Alright, I haven't posted in a while. Hopefully I have enough stuff to show to redeem myself. Since the last post, I've been working on my new character, Sam, and also helping Andy with some more character rigging.

As rigging is possibly the most boring thing in 3D to talk about, i'll gloss over that (but don't you forget I did it!) and instead talk about the character, including pretty pictures.

So to start off I compiled a little folder of images to use as inspiration for the piece, along with a few sketches and other bits and bobs. Around the time I was scouring the web for pictures I came across an article, by chance, on Mick Jagger who must've been some sort of subconscious influence on my guy because they aren't too disimilar.


The main thing that I liked about these shots of Jagger was his ridiculous gurn, most of all his mouth, which was the sort of expression that i've wanted Sam to have for some time.

And then out of nowhere, here we have a disturbingly attractive shot... weird, but I like the contrast.

This is another image I picked up. Real life sculpting, folks, but obviously whether it's digital or RL, it's not so different really. The mouths, again, I thought would be helpful. Also the lion-o sculpt is boss.

This is one of the first few pages I drew of Sam that I thought fit his personality.
And after many attempts, here is the turnaround sheet for Maya. This was pretty difficult to get right. I wanted him to look fairly unhinged but not axe-murderer or mental asylum mad.

A fairly crappy looking pose sheet (so bad at these, really need to practice.) I went for the one on the middle right. You'll see in a second.

So I got to modeling. I decided to model him in a traditional static pose and make a crude rig in Maya to get the rough pose which I would later take to mudbox to make pretty. Above is me testing out a bunch of different render settings, trying to get rid of the grainyness in the shadows. Didn't really work, need to figure it out for final renders.

Close-up of his face. It's really difficult to get an accurate translation from 2D to 3D I find. Especially in Maya since it's quite restricting as far as if you want to make major changes then it takes a good bit of time. He looks like he's possibly passed into the realms of mad-mad, but I think i'm leaving him like this until mudbox, where I find it much easier to change proportions and stuff. A little worried about bringing him back into Maya after that, though. Do I retopo? Disp maps maybe? Hmm.

Well that was pretty sharpish. Finally I'll leave you with a link to the turnaround (will probs embed later). This is where i'm currently at: http://vimeo.com/11428114
He's posed, needs a few tweaks and to be UVd but then it's into mudbox :D (should I have UVd before posing.. perhaps.)

P.s. Website is well underway, and it'll be an awesome one :D when that's done i'll probably start blogging there instead. Anyway, seeya soon!

Friday, 16 April 2010

New Term!

Back once again. Was away for a week and a bit over Easter when I went up to Scotland, which was pretty cool. Edinburgh, especially, is lovely. Got back on Monday and was back in the studio Tuesday morning, bright and early. When I left, I left behind a fully rigged Lightning Mike who was in need of being bound, so that's what I got straight to work on. Before I go into that and the rest of the week's work, i'll go over some of the troubles I encountered when I was rigging the bugger.

Rigging Mike
So after I came to terms with the state of the model, accepted it's flaws etc, I got to work on the rigging. I really didn't expect to bump in to any more problems, as the rig was to be very basic with nothing fancy but lowe and behold, all hell broke loose. That might be a bit dramatic, but I encountered a problem which put a massive dent in my schedule.

The problem, as with Andy's rigs, was that the elbows were spazzing out to high heaven. Whenever i'd move the pole vectors anywhere near to the bones, they would start to go crazy and it was as if they were on reverse or something. I've snapped a screenshot of one of the many tests I made, but it doesn't really do it justice.


On the left of the image are two sets of joints that I created with very mild differences to the original bones of mike's arm (pictured right) that were going mental. The first picture shows them in the default pose, and you can see the problem in the second picture. I must've made about 20 or more difference joint chains whilst trying to figure this stupid thing out, and spent I don't know how many hours. The worst thing is though, that I never really nailed down what was going wrong. In the end I solved the problem by remodeling the arms so that there was more of a bend in the elbow. The only reason I can think for the trouble was that the IK handles just got confused and didn't know wtf was going. I won't be making the mistake again, though. Bent 4lyfe.

Since it's been a while since I encountered that problem, i'm not speaking as emphatically as I may have back when it was doing my head in, but that's probably a good thing. At least now it's solved, so I can go on to bigger and nastier problems.

Binding/Weighting

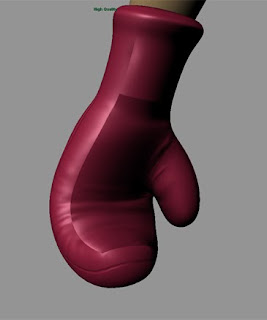
As I said, when I got back I went ahead with binding pretty much straight away. We have like 1 day left, so there's literally no time to waste. With that in mind, I started binding as quickly as I could, whilst being less picky than I usually am. The results are alright, I've a bunch of pictures of my character in the pose that I drew him in in the concept art, which is a moderately articulated pose and shows the level of weighting off quite well. In the pictures you'll notice an intersection on the glove (an area which is quite tricky, I think I could've placed the joints a fair bit better than I have), but that's about it. The shoulder is a tricky area but i'm hoping that it'll do for the small bit of test animation that i'm hoping to get done with him. It's a far cry from my hopes of a perfectly polished and working rig, but I guess that was a little too much to ask for.

Anywho. After rigging I started doing blendshapes, the first that i've done, which were in equal measures enjoyable and irritating. Not much to say, really, so let's get on with the pictures!


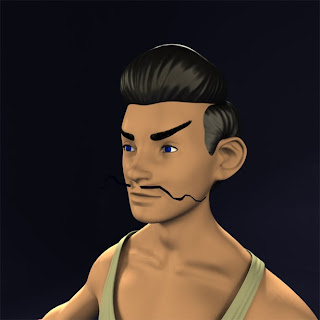
Did this for a laugh by flipping one of the renders. Looks pretty cool I think! But I forgot the moustache :O


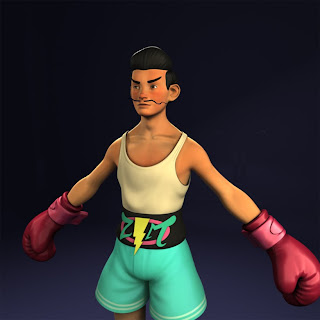
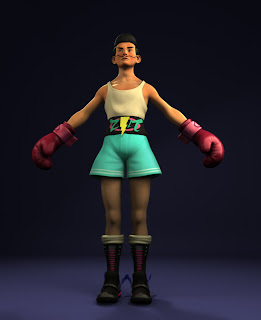
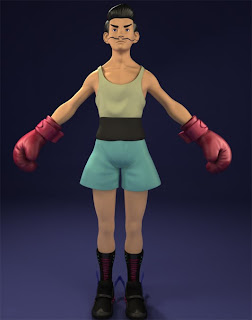
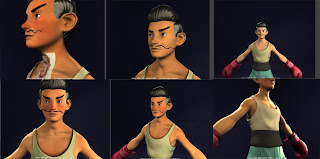
Full body shot and a few caps of process/blendshapes


Happy! This is the initial shape I did, without an added shape that you can see in the picture above, which gives him dimples dawww.


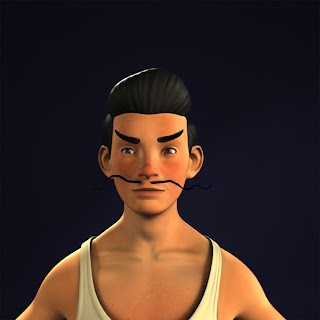
Coolest angry face render i've done >:O

And that's about it. I'm very tempted to start my next character on Monday. Will need to chat to the tutors first, though. There's a lot about this guy that needs cleaning up and improving, but why dwell!? Looking forward to my next one :D

Thursday, 18 March 2010

Friday post.

Posted a few pictures here on Thursday for the production meeting, and now I have a spare minute i'll elaborate on them, and complain about a few things while i'm here.

In fact I think i'll start the complaining right away. At the minute i'm feeling like i'm in a bit of a mess. My model is alright but not great. There's so much that I still don't know, e.g. practically everything to do with materials and texturing, and a whole lot of other stuff and it's kind of wearing me down. Apart from the textures that i've painted (a category in which you can probably only include the skin) I feel i've accomplished very little.

This would be down to a few things;
-Complete lack of knowledge in the area. I understand that this is the way that 3D, or as Derek said, everything, is as far as learning goes, but sometimes it's easier going than others.
-My nature. I seem to be unable to accomplish what I would like to - what I have in my head - due to my lack of knowledge, and it's leading me to continually tweaking and re-tweaking but making no headway. At least this is with the Maya materials. Mental Ray materials are a whole different matter, and bring up problems that so far I can't solve. For some reason the mental ray materials seem to require twice or three times the light strength as maya materials do, which must be something to do with a setting in my Maya, because it doesn't seem to be happening to others in tutorials i've watched. I digress.
-Lack of motivation. I think a combination of the above and other influences have depleted my motivation a little. I can't deny that I haven't been working as hard as I have been previously, and I find myself getting easily distracted by any old rubbish I find on the internet. Rendering things probably doubles the procrastination also, as when you're rendering there's potentially a few minutes where Maya is unusable, and unless I have a pencil and paper in front of me then I just end up getting sidetracked by facebook or some other timewaster.

Doom and gloom aside, I've learnt a hell of a lot throughout this whole process, and the year so far. More than I thought i'd have learned really. And (this should be my catch phrase the amount of times that i've said it recently) I really think that the next character I make will be twice as good or better than my current guy (or perhaps i'm forgetting the hardships of basemesh modeling a little?). I'd be happy to leave this guy as he is and just bank the knowledge that i've gathered, but I think that'd probably be poor form, so i'll press on and tbh I think the outcome will at least be decent.

But yeah, lighting is a bugger. Don't think I like lighting at all. Sucks that my rigs are failing for Andy, too, but I guess that's another thing to learn from. Onto the pics.


Here's an ugly little example of the woes I faced in the world of normal maps. This'll be the last time I dwell on them I promise :P (although Georg did suggest doing my innovation project on them... I do think that'd save a few people some stress if they actually read it, but I would quite like to make a monster hand.)

Anyway, the right is my hi-res sculpt, and the left is the disgusting translation that I was presented with in Maya using my very first normal maps. Crap right? Well after a hell of a lot of effort I figured it out, and here's a little rundown of what I was doing wrong.
1. UVs were bad. Make your UVs correlate as closely as possible to the polygons which they relate to. It's as simple as that, but tedious work.
2. The artifacts on the vest are due to the geometry of the basemesh and the way which Mudbox read the hi-res mesh when it was baking out the normal maps. Since the mesh is two-sided, I believe mudbox was bringing through the inner-layer of the vest when I only wanted it to sample the front. To remedy this, choose "Furthest outside" as an option when creating your normal maps. (This method will potentially throw up some new errors if the geo you're creating normals for has more geometry close to the outside. e.g. when I used this setting on the shorts, the inside leg of the shorts had the opposite leg imprinted on it.)
3. To a lesser extent, and at the risk of telling the obvious, different materials react differently to light. Duh. Obviously the shiny materials in Mudbox will look different to the lamberts I used in Maya. Next time I sculpt I plan to use approximations of materials and possibly colours from the get-go in Mudbox.

That's enough of that. Here are some screenshots of where i'm at currently.


Pretty? Hope so... don't think it'll be a whole lot different when all is said and done, but it'll have to do for now.

Next week, to give myself some purpose and direction, I'm going to start rigging him. I want him rigged and weighted by Friday. It's a challenge, but one which I intend to complete. If I don't get him done i'll be a goner. That's all for now. See you next week bloggers.

Sunday, 14 March 2010

Evening.

Hi there. Ain't posted for 2 weeks so hopefully i'll have quite a bit to show :)

What i've done:
-Finished hi-res sculpt :D
-Figured out normal mapping (huge achievement for me)
-Started textures and materials.

Hi-res Sculpting

First off - here he is :)

Hi-Res Lightning Mike Sculpt Turntable from Jacob Golding on Vimeo.


Slightly dodgy video as I was using a new plugin that I downloaded, but it should be alright. Also before I start talking about it, as a note only his right glove is sculpted, as I planned to mirror it for the right glove and also his socks have been modeled since then. Right.

Mudbox is pretty cool. I found it a little daunting getting used to it, but that's more because of the fact that I had all of the tools needed to create amazing art and it was just down to me now. Most of the tools work as you'd expect them to (not got the hang of flatten yet) and the interface is fairly simple and very intuitive compared to zbrush. Especially when you've just come from Maya, as it uses most of the same shortcuts and such too.

I had a few niggles here and there, mostly involving normals (not mapping, just the normals facing the wrong direction etc), had a little trouble with instanced objects also but that was pretty standard sorting out. Apart from those minor setbacks though, I feel i'm sort of settling into it, albeit slowly.

When modeling in Mudbox I get the same feeling as I do when painting in photoshop. There's so much scope for tweaking this and that and redoing bits that sometimes I get caught up in one tiny, potentially insignificant, area, and I start to waste time. Being a perfectionist can be a hinderance, and sometimes you just have to stop yourself. It can also be intimidating changing areas because you're scared that the changes you make won't be as good as what you already have. I think this is one of the reasons for the hi-poly being relatively... tame? I didn't really push the sculpt to any extreme, but I think this may also be because of the nature of the character and my lack of expertise with the software. Anyway i'm satisfied with what i've done and look forward to my next sculpt (which I reckon will be much better).

Normal Mapping: O

So after the stuff I was on about last week (which i'm too lazy to read back over, I talk too much :P) i've learnt a bit about normal mapping. After i'd sculpted the shorts and the shirt I started baking out the maps using mudbox. But annoyingly they didn't look how I wanted them to. I didn't take any screenshots, but the shorts were very pixelated and the vest was just looking ugly. The maps weren't working how I wanted them to at all. I couldn't find any good tutorials online so I was working purely by trial and error, and tried a million and one things to sort them out.

I tried making the maps bigger (4k square they're currently at. I still don't know if that's a bit extreme or not, but it's the highest mudbox will allow.) That didn't seem to sort it, so I tried using TIF instead of PNG which involves taking the new TIFs into Photoshop and resaving them without any sort of compression as mental ray doesn't support it, leaving them at like 200MB each which is seemingly a bit excessive. Very little difference there either. I tried using different basemeshes, I tried using a different program called xNormal to generate my normal maps, still nothing. So I went back to the UVs, a potential problem i'd thought of but put at the bottom of the list, tweaked a few bits and bobs your uncle :D The problem was that the UVs that contained the most important bits of detail on both the shorts and the vest (the two areas i was testing on -- bit of a coincidence) didn't have enough space. The UVs were squashed up and as a result the normals came out crappy as they were stretched over a bigger area than they were meant to be. Felt great when I finally got them working. Seems like UVs are a big deal! Here's a little run-through of how i've been doing my normals, and how they seem to work best, just in case you care or could find it helpful.

-Start with a tidy basemesh. This includes frozen transformation, normals facing the right way, no instances, deleted history, GOOD UVS! all that good stuff.
-Take into mudbox, sculpt your hi-res stuff. (Make sure smooth target UVs or whatever it's called is checked before you start subdividing the mesh, cause Cherie said so)
-Go to export your normal maps
--Here i've currently been using the level 0 model in mudbox as the target mesh and the highest level as the source, (think that's right) but I think in the future i'll take the highest level into Maya, pull the verts of the original basemesh a little to fit the hi-res, and use that as the target as long as the computer can handle it. This is because the level 0 can get a bit mooshy and lose some detail during hi-res sculpting.
-TIF for format, 4k for size, (use whatever you want/need.) and i've been using closest inside and out unless the model has two sided, like the vest which seemed to glitch out the normal maps. In that case I used furthest outside, and i've also been using best guess for the distance thing.

That's all I can think of now, I did do a little writeup on a piece of paper but i dunno where he is.

That's enough chat, here are some pictures of my normal mapping experience, with a few dodgy materials thrown on.


Looking at these now they don't actually show off the mapping too well, blinns are better for that, but the end material won't be a blinn so I went with a lambert. Also I turned up ambient colour as it made it pretty, but that wont be on neither. I think that's making it look a little more washed out.


Pretty good example here. Glove is very low poly but looks just as good as the hi-res!


Face for face's sake. I'm not sure why, not even sure if the normal map is on there lol.


Here's a weird glitch that happens in the viewport. You can see the seams really badly, and I tried fixing this in photoshop for a while until I realised that it doesn't actually show in the render. Duh.

Texturing/Mats

I'll keep this short as i'm getting tired, but that should be easy as i've only recently started with the texturing. Here's a few screenshots of the texture in progress! :D


I think it's going pretty well. You can see the reference i'm using comically plastered on his chest. This won't be in the final version :P The look i'm going for is sort of pristine I guess, but I really like a little bit of sort of real life skin texture here and there. I did try to find pictures I could use to project onto him but I didn't really know where to look. I've only really worked on his cheeks and his nose so far but yeah.

One thing that's bugging me is SSS. I'm still having problems with the skin shading, and looking at how little time we have left I don't think it makes much sense to spend any more time on it, all for a little glow in the ear. I might pick it up when I get to my next character or maybe I will do it. We'll see. I think i'm about 2 weeks behind as it is but i'm really hoping that I don't get any more tripups and can just power through the rigging etc and make up a little time. We all knew it wouldn't be as easy as it sounded right? To be honest there are a ton of things that I don't like about this guy, but I just don't have the time to fix them. The bottom line is that he looks alright -- passable, and that's alright for now. He is my first fully finished hi-res sculpted model after all. I'm really looking forward to going on to the next guys as like I say, they'll be waaaaaaay better. I've learnt a whole lot and look forward to mastering what i've learnt :) That'll do for now. Laters!

Friday, 26 February 2010

Normal... Moping (I am literally (not literally)) on fire with the puns today.

Alright. Quite an eventful, if not very interestingly so, week this week. I always forget exactly how it's gone but it's safe to assume that i've worked on both mine and andy's projects. Both are still running side-by-side meaning we've not cleared up the rigs on andy's project yet, but it's just how it goes. It never was going to be as easy as we though eh. I won't get into it this time, but it's just gonna be a case of seeing it through to the end. Andy deserves some good quality characters to go along with his cracking animatic he just finished.

So. I've nothing to show as far as the pirates are concerned, but i've a crap load to show for LIGHTNING MIKE rrrrrowerowjie.

This week i've been playing with the basemesh. Initially I changed the proportions of everything as it wasn't exactly to my taste. Here I am using photoshop to measure up the props' to figure out what was wrong. I used the Loomis figure drawing/anatomy book as a guide for what should go where.


After that I basically fiddled around til I was a little more happy. I'm not completely happy, a theme which will reoccur throughout this post, but what can you do...

So the proportions have changed, probably not very noticeably but whatever. After that, though, I got to do UVs!!


Here's an unnecessarily large snapshot, but couldn't be arsed to resize. My first proper set of uvs, they are. I didn't really mind the process. Sort of like a silly puzzle. That's just one set out of a forthcoming 21309821 though, so i'm sure i'll start to mind after a while.

After that I got to go to mudbawks. In mudbawks I spent forever and a day trying to tweak the model. Basically it's HARD to hi-poly model. The process reminded me of painting in photoshop. Tweak tweak tweak and you get nowhere. I don't think my personality helps me out here as i never seem to be happy. But I feel like I just need more experience with the program and it'll slowly get better. Of course this isn't the best position to be in facing what I am, but i'll sort something out.

I got tired of failing so I took what i'd made (a hi-res with very few changes, although the little that were there i was relatively (key word) happy with). Did a load of boring crap and took it into Maya to find that stuff wasn't working. To cut a looooong story short I basically had potentially 3 problems.

1. My UVs were linked up incorrently. Fixed by going Relationship Editors - UV Linking - Texture Centric and linking them right.
2. I forget two but there was definitely a two. EDIT: oh, it was normals. I had insane normals going on, so Georg helped me out, fixing it by exporting it as an OBJ without normals then importing it back in.
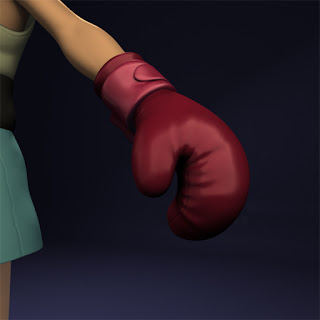
3. Cherie said that in Mudbox you have to have Smooth UVs checked (Mesh > Add Subdiv Level option box). Although i'm not sure if this did anything, i've ticked it now and it's going smootly. Here's an example of my problems anyway, Left is some bonkers stuff that may have been due to problem 3. Middle is problem 1. and right is a test i did to figure stuff out.


After that was sorted, I applied all my maps correctly and that stuff and this was the result.


Left is base mesh, middle is with normal map, right is my mudbox hi-res. As you can see there seems to be fuck all difference! there's very slightly more definition than the base mesh... So... i'm not entirely sure why this is - possibly because of shoddy normal maps or just because the hi-res really isn't that different... although to me it looks pretty different in the mudbox sculpt. Perhaps that's an optical illusion cause of the mud. Regardless, I figured i'd just continue on rather than get stuck in a rut. The next stage was textures, so I laid down a flat colour on my UVs and applied it. But then I thought 'what about lighting?'. So i found a tutorial online to create a basic light rig. Here's some snaps of that. (boring.)


So I played with the materials and crap and ended up with this:


As per usual, I am not happy. The whole thing just looks amateurish and mooshy and crap. I'm in half a mind to restart entirely, but that's probably not a good idea. I'll stop the moping, for now anyway, have a nice weekend (Los Campesinos! tonight! :D) and see what my brain thinks on monday.

Before I leave, here's one last thing that I did this week, and it's cool. Basically we're arranging a street fighter tournament in falmouth and I made the posters :D Won't indulge because andy's waiting for me to leave but here are some of the versions I made and subsequently plastered up around uni ^_^ can't wait for this. By for now !